
Xmonad in LinuxMint 12 “Lisa”
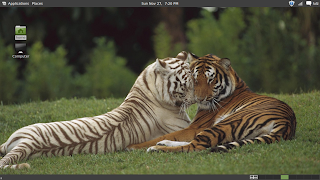
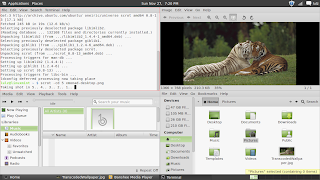
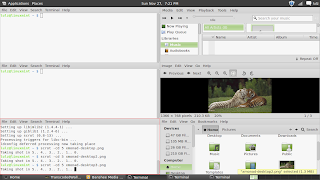
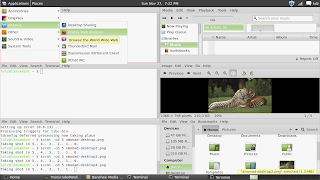
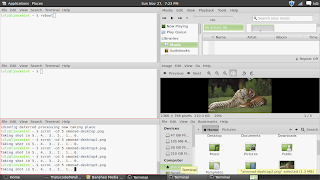
As you can see in the images, when combining xmonad with Gnome3 of Linux Mint, you will have a Gnome3 desktop using xmonad as the window manager. The tiled windows fit really nice between the 2 panels and it’s totally clickable when using xmonad with Gnome3. You can switch between workspaces in Xmonad either by using the keybindings or by clicking on the bottom panel. You also dont need to use dmenu or other launchers since you already have the Linux Mint menu on the top panel.
If you’re using the new Linux Mint and want to try xmonad, here is how:
Step 1: Installing xmonad.
Just run
sudo apt-get install xmonad
Step 2: Creating the xmonad session.
First, you need to add the xmonad session to gnome session, the file you need to create is /usr/share/gnome-session/sessions/xmonad.session. Just open a terminal and run the following command:
sudo gedit usr/share/gnome-session/sessions/xmonad.session
After you enter the password, a gedit window will open, just copy-paste the following lines into it then save and quit:
 [GNOME Session]
 Name=Xmonad Gnome
 RequiredComponents=gnome-panel;gnome-settings-daemon;
 RequiredProviders=windowmanager;
 DefaultProvider-windowmanager=xmonad
Next, you need to create an xmonad desktop file, the file would be /usr/share/xsessions/xmonad-gnome-session.desktop. Just do the same as the previous step, open a terminal and run this command:
sudo gedit /usr/share/xsessions/xmonad-gnome-session.desktop
After the gedit window appears, add the following lines into it then save and quit:
 [Desktop Entry]
 Name=Xmonad GNOME
 Comment=Tiling window manager
 TryExec=/usr/bin/gnome-session
 Exec=gnome-session --session=xmonad
 Type=XSession
Step 3: Configuring xmonad
This step is pretty easy, I’ve been writing in details about this in my tutorial about how to set up and configure xmonad in Arch Linux. I recommend you to read this article and the xmonad archives in the haskell homepage to know more about xmonad.
But if you only want to test, you just need to create the file ~/.xmonad/xmonad.hs. A simple xmonad.hs to use in Gnome3 would be like this:
 import XMonad
 import XMonad.Config.Gnome

 main = do
    xmonad $ gnomeConfig
The xmonad.hs I used to test Xmonad in my laptop with a frech keyboard is like this ( I also changed the mod key to the window key):
 import XMonad
 import XMonad.Config.Gnome
 import XMonad.Config.Azerty
 import qualified Data.Map as M

 main = do
    xmonad $ gnomeConfig {
         modMask = mod4Mask
         , keys = \c -> azertyKeys c `M.union` keys gnomeConfig c
         }
After you save the xmonad.hs file, just open the terminal and run the following command:
xmonad --recompile
And everything is done, just log out and choose Xmonad Gnome as the login session and you can run Xmonad in Linux Mint like a cool Linux geek now.
Older Post
Home